Firearm Cerakote
YOUR PERFECT PAINT JOB
The engraving process begins with the development and approval of the design. This is a collaborative stage, where clients can bring their own ideas or work with the team to create something from scratch. Artwork can be hand-drawn, traced from reference images, or sourced using platforms like Google or AI design tools. Once the final artwork is prepared, client approval is essential before moving forward to ensure alignment on the final output.
The Painting Process

Design, Approval & Preperation
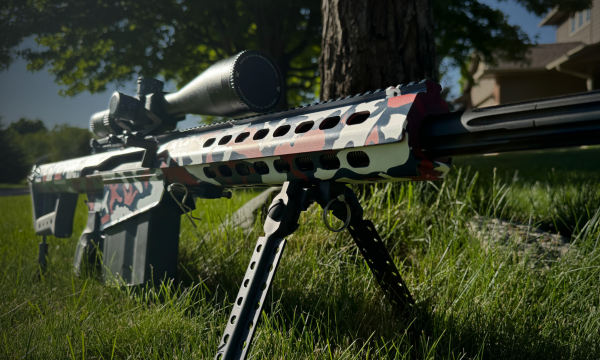
The Cerakote process begins with the development and approval of the design. This is a collaborative stage where clients can bring their own ideas—whether it’s a concept, logo, or color scheme—or work closely with our team to create something custom from scratch. Designs may be hand-drawn, inspired by reference images, or developed using digital tools, and final approval is always secured before moving forward to ensure alignment on the finished look. Once the creative direction is locked in, we begin physical prep by fully disassembling the item and cleaning all components with a degreaser or solvent like acetone. Areas not to be coated are masked off using high-temp tape and plugs. The surface is then sandblasted with 100–120 grit aluminum oxide or garnet to produce a uniform matte texture—crucial for Cerakote adhesion. Throughout this phase, gloves are worn and strict care is taken to prevent contamination before coating begins.


Stenciling & Base Coat Application
Using high-quality Oracal 651 vinyl, stencils are cut with a Graphtec Cutting Plotter CE7000 to achieve precise, clean lines. Once weeded and prepared, the stencils are ready. The base coat Cerakote is mixed (typically 18:1 ratio with hardener), strained, and sprayed evenly with an HVLP spray gun from 4–8 inches away. After spraying, the item is flash cured in a 150°F oven for 10–15 minutes, then cooled before stencil application for the next layer.

Layering & Design Build-Up
With the base coat flash cured, vinyl stencils are applied for the second color. The same spray and flash-cure steps are repeated for each additional coat. Multiple layers and colors can be added by repeating the process—each stencil must be carefully placed, each coat cured, and each design element protected with precise masking. This ensures crisp designs and no color bleeding across layers.


Final Cure & Reassembly
Once all coating and stencil work is complete, all tape, plugs, and vinyl are carefully removed. The item is then oven-cured at 250°F–300°F for one hour, or according to product-specific guidelines, to ensure long-lasting durability. After curing, a final inspection is conducted to check for clean lines, stencil integrity, and even coverage. Any imperfections are touched up as needed.
Reassembly is done with expert precision—backed by Master Gunsmith certification—ensuring every component fits perfectly and all tolerances and functions are fully maintained.


